Emote: Building Source: Remote: Remote: ! Could Not Complete the Action. Please Try Again Later.
This browser is no longer supported.
Upgrade to Microsoft Edge to accept advantage of the latest features, security updates, and technical support.
Troubleshoot Remote desktop disconnected errors
This article helps y'all understand the almost common settings that are used to constitute a Remote Desktop session in an enterprise environment, and provides troubleshooting data for Remote desktop disconnected errors.
Applies to: Windows Server 2012 R2
Original KB number: 2477176
Annotation
This article is intended for utilise by support agents and IT professionals.
Remote Desktop Server
A Remote Desktop Session Host server is the server that hosts Windows-based programs or the full Windows desktop for Remote Desktop Services clients. Users can connect to an RD Session Host server to run programs, to save files, and to employ network resource on that server. Users can admission an RD Session Host server from within a corporate network or from the Cyberspace.
Remote Desktop Session Host (RD Session Host) was formerly known as the Remote Desktop server part service, and Remote Desktop Session Host (RD Session Host) server was formerly known as Remote Desktop server.
Remote connections for administration
Remote Desktop supports two concurrent remote connections to the figurer. You lot do not take to have Remote Desktop Services client access licenses (RDS CALs) for these connections.
To allow more than two administrative connections or multiple user connections, yous must install the RD Session Host Function and accept appropriate RDS CALs.
Symptom 1: Express Remote Desktop session or Remote Desktop Services session connections
When y'all endeavor to make a Remote Desktop Connexion (RDC) to a remote estimator or to a Remote Desktop server (Terminal Server) that is running Windows Server 2008 R2, y'all receive 1 of the following error letters:
Remote Desktop Asunder.
This reckoner can't connect to the remote estimator.
Attempt connecting again. If the problem continues, contact the possessor of the remote calculator or your network administrator.
As well, yous are limited in the number of users who tin connect simultaneously to a Remote Desktop session or Remote Desktop Services session. A limited number of RDP connections can be acquired by misconfigured Grouping Policy or RDP-TCP properties in Remote Desktop Services Configuration. By default, the connection is configured to permit an unlimited number of sessions to connect to the server.
Symptom 2: Port assignment conflict
You experience a port assignment conflict. This problem might betoken that another application on the Remote Desktop server is using the aforementioned TCP port as the Remote Desktop Protocol (RDP). The default port assigned to RDP is 3389.
Symptom 3: Incorrectly configured hallmark and encryption settings
After a Remote Desktop server customer loses the connection to a Remote Desktop server, you experience i of the following symptoms:
- You cannot make a connectedness by using RDP.
- The session on the Remote Desktop server does not transition to a disconnected state. Instead, it remains agile even though the customer is physically asunder from the Remote Desktop server.
If the client logs back in to the same Remote Desktop server, a new session may be established, and the original session may remain agile.
Likewise, y'all receive one of the following error letters:
-
Fault bulletin 1
Because of a security error, the client could not connect to the Terminal server. Afterward making certain that y'all are logged on to the network, try connecting to the server again.
-
Error message two
Remote desktop disconnected. Because of a security error, the client could not connect to the remote figurer. Verify that you are logged onto the network and then try connecting again.
Symptom four: License certificate corruption
Remote Desktop Services clients are repeatedly denied access to the Remote Desktop server. If y'all are using a Remote Desktop Services client to log on to the Remote Desktop server, you may receive one of the following fault messages.
-
Error message 1
Because of a security error, the client could not connect to the Terminal server. After making sure that you are logged on to the network, try connecting to the server again.
-
Error message 2
Remote desktop asunder. Considering of a security error, the client could not connect to the remote computer. Verify that you are logged onto the network and and so try connecting again.
-
Error bulletin 3
Considering of a security error, the client could not connect to the Terminal server. After making sure that you lot are logged on to the network, effort connecting to the server once again.
Remote desktop disconnected. Because of a security mistake, the client could not connect to the remote computer. Verify that you are logged onto the network and and so try connecting again.
Additionally, the following event ID messages may be logged in Event Viewer on the Remote Desktop server.
-
Issue message 1
Outcome ID: 50 Event Source: TermDD Event Clarification: The RDP protocol component X.224 detected an error in the protocol stream and has disconnected the client. -
Upshot message 2
Effect ID: 1088 Event Source: TermService Outcome Description: The terminal services licensing grace period has expired and the service has not registered with a license server. A terminal services license server is required for continuous performance. A final server tin operate without a license server for 90 days afterwards initial outset upwardly. -
Event bulletin 3
Event ID: 1004 Event Source: TermService Issue Clarification: The concluding server cannot consequence a client license. -
Event message 4
Event ID: 1010 Event Source: TermService Event Description: The terminal services could not locate a license server. Confirm that all license servers on the network are registered in WINS/DNS, accepting network requests, and the Final Services Licensing Service is running. -
Effect message five
Event ID: 28 Event Source: TermServLicensing Event Description: Concluding Services Licensing can only be run on Domain Controllers or Server in a Workgroup. See Last Server Licensing aid topic for more information.
Resolution for Symptom one
To resolve this problem, use the following methods, equally advisable.
Verify Remote Desktop is enabled
-
Open the Organisation item in Control Panel. To start the System tool, click Start, click Control Panel, click Organisation, and then click OK.
-
Under Control Panel Domicile, click Remote settings.
-
Click the Remote tab.
-
Under Remote Desktop, select either of the available options, depending on your security requirements:
-
Allow connections from computers from computers running any version of Remote Desktop (less secure)
-
Permit connections from computers only from computers running Remote Desktop with Network Level Hallmark (more secure)
-
If you select Don't let connections to this reckoner on the Remote tab, no users will be able to connect remotely to this computer, even if they are members of the Remote Desktop Users grouping.
Verify Remote Desktop Services Limit number of connections policy
-
Start the Group Policy snap-in, and and so open up the Local Security Policy or the advisable Group Policy.
-
Locate the following command:
Local Computer Policy > Estimator Configuration > Authoritative Templates > Windows Components > Remote Desktop Services > Remote Desktop Session Host > Connections Limit number of connections
-
Click Enabled.
-
In the RD Maximum Connections immune box, type the maximum number of connections that you want to allow, and then click OK.
Verify Remote Desktop Services RDP-TCP properties
Follow these steps, depending on your operating system version.
Setting via Remote Desktop Services Configuration
Configure the number of simultaneous remote connections immune for a connection:
-
On the RD Session Host server, open Remote Desktop Session Host Configuration. To open Remote Desktop Session Host Configuration, click Offset, point to Administrative Tools, point to Remote Desktop Services.
-
Nether Connections, right-click the name of the connectedness, and and so click Backdrop.
-
On the Network Adapter tab, click Maximum connections, enter the number of simultaneous remote connections that y'all want to allow for the connectedness, and then click OK.
-
If the Maximum connections option is selected and dimmed, the Limit number of connections Group Policy setting has been enabled and has been applied to the RD Session Host server.
Verify Remote Desktop Services Logon rights
Configure the Remote Desktop Users Group.
The Remote Desktop Users group on an RD Session Host server grants users and groups permission to remotely connect to an RD Session Host server. You tin can add together users and groups to the Remote Desktop Users group past using the post-obit tools:
- Local Users and Groups snap-in
- The Remote tab in the System Properties dialog box on an RD Session Host server
- Agile Directory Users and Computers snap-in, if the RD Session Host server is installed on a domain controller
You tin can utilize the following procedure to add together users and groups to the Remote Desktop Users grouping past using the Remote tab in the System Properties dialog box on an RD Session Host server.
Membership in the local Administrators group, or equivalent, on the RD Session Host server that you plan to configure, is the minimum required to complete this process.
Add users and groups to the Remote Desktop Users group past using the Remote tab
-
Outset the System tool. To do this, click Offset, click Control Panel, click the Organisation icon, and and then click OK.
-
Under Control Console Home, click Remote settings.
-
On the Remote tab in the System Properties dialog box, click Select Users. Add the users or groups that have to connect to the RD Session Host server past using Remote Desktop.
Note
If you select the Don't allow connections to this calculator option on the Remote tab, no users will exist able to connect remotely to this computer, fifty-fifty if they are members of the Remote Desktop Users group.
Add together users and groups to the Remote Desktop Users group by using Local Users and Groups snap-in
- Click Start, click Administrative Tools, and then click Computer Direction.
- In the panel tree, click the Local Users and Groups node.
- In the details pane, double-click the Groups folder.
- Double-click Remote Desktop Users, then click Add.
- In the Select Users dialog box, click Locations to specify the search location.
- Click Object Types to specify the types of objects that you lot want to search for.
- In the Enter the object names to select (examples) box, blazon the proper name you lot desire to add.
- Click Check Names.
- When the name is located, click OK.
Note
- You can't connect to a computer that's asleep or hibernating, so make sure the settings for sleep and hibernation on the remote reckoner are prepare to Never. (Hibernation isn't available on all computers.) For information about making those changes, see Change, create, or delete a power plan (scheme).
- You tin can't use Remote Desktop Connectedness to connect to a computer using Windows seven Starter, Windows seven Home Basic, or Windows 7 Dwelling house Premium.
- Members of the local Administrators group can connect even if they are not listed.
Resolution for Symptom ii
Important
This section, method, or chore contains steps that tell you how to modify the registry. All the same, serious problems might occur if you modify the registry incorrectly. Therefore, brand sure that yous follow these steps advisedly. For added protection, back up the registry before you change it. And so, y'all can restore the registry if a trouble occurs. For more information about how to back upwards and restore the registry, see How to support and restore the registry in Windows.
To resolve this problem, make up one's mind which application is using the aforementioned port as RDP. If the port assignment for that application cannot be changed, change the port assigned to RDP by irresolute the registry. After you alter the registry, you must restart the Remote Desktop Services service. Afterward you restart the Remote Desktop Services service, you should verify that the RDP port has been changed correctly.
Remote Desktop server listener availability
The listener component runs on the Remote Desktop server and is responsible for listening for and accepting new Remote Desktop Protocol (RDP) client connections, thereby allowing users to establish new remote sessions on the Remote Desktop server. At that place is a listener for each Remote Desktop Services connexion that exists on the Remote Desktop server. Connections tin can be created and configured by using the Remote Desktop Services Configuration tool.
To perform these tasks, refer to the following sections.
Determine which awarding is using the same port as RDP
You tin run the netstat tool to determine whether port 3389 (or the assigned RDP port) is being used by another application on the Remote Desktop server:
- On the Remote Desktop server, click Start, click Run, blazon cmd, and and so click OK.
- At the command prompt, type
netstat -a -oand so printing Enter. - Look for an entry for TCP port 3389 (or the assigned RDP port) with a status of Listening. This indicates another application is using this port. The PID (Process Identifier) of the process or service using that port appears under the PID column.
To decide which awarding is using port 3389 (or the assigned RDP port), use the tasklist command-line tool forth with the PID information from the netstat tool:
- On the Remote Desktop server, click Commencement, click Run, type cmd, and and so click OK.
- Type
tasklist /svcand then press Enter. - Await for an entry for the PID number that is associated with the port (from the netstat output). The services or processes that are associated with that PID appear on the right.
Change the port assigned to RDP
You should determine whether this application can utilise a different port. If you cannot change the awarding's port, you lot must change the port that is assigned to RDP.
Of import
Nosotros recommend that you exercise not modify the port that is assigned to RDP.
If you have to change the port assigned to RDP, you must change the registry. To exercise this, you must be a member of the local Administrators group, or you must accept been granted the appropriate permissions.
To change the port that is assigned to RDP, follow these steps:
-
On the Remote Desktop server, open up Registry Editor. To open Registry Editor, click Start, click Run, type regedit, and and so click OK.
-
If the User Account Control dialog box appears, verify that the activity it displays is what you lot want, and then click Continue.
-
Locate and then click the following registry subkey:
HKEY_LOCAL_MACHINE\System\CurrentControlSet\Command\Remote Desktop server\WinStations
RDP-TCP is the default connection proper noun. To change the port for a specific connectedness on the Remote Desktop server, select the connection under the WinStations key:
- In the details pane, double-click the PortNumber registry entry.
- Blazon the port number that yous want to assign to RDP.
- Click OK to relieve the alter, and then shut Registry Editor.
Restart the Remote Desktop Services service
For the RDP port assignment change to accept effect, stop and start the Remote Desktop Services service. To exercise this, you must exist a member of the local Administrators grouping, or you lot must take been granted the appropriate permissions.
To stop and first the Remote Desktop Services service, follow these steps:
-
On the Remote Desktop server, open the Services snap-in. To do this, click Offset, point to Administrative Tools, and then click Services.
-
If the User Account Control dialog box appears, verify that the action information technology displays is what you want, and and then click Continue.
-
In the Services pane, right-click Remote Desktop Services, and then click Restart.
-
If you are prompted to restart other services, click Yep.
-
Verify that the Status column for the Remote Desktop Services service displays a Started status.
Verify that the RDP port has changed
To verify that the RDP port consignment has been changed, use the netstat tool:
-
On the Remote Desktop server, click Start, click Run, blazon cmd, and and so click OK.
-
At the command prompt, type
netstat -athen press Enter. -
Look for an entry for the port number that you assigned to RDP. The port should appear in the list and have a status of Listening.
Important
Remote Desktop Connection and the Terminal server Spider web Client utilize port 3389, by default, to connect to a Remote Desktop server. If you alter the RDP port on the Remote Desktop server, you lot volition have to modify the port used by Remote Desktop Connexion and the Remote Desktop server Spider web Client. For more information, see Change the listening port for Remote Desktop on your figurer.
Verify that the listener on the Remote Desktop server is working
To verify that the listener on the Remote Desktop server is working correctly, use any of the following methods.
Note
RDP-TCP is the default connection proper name and 3389 is the default RDP port. Use the connexion proper name and port number specific to your Remote Desktop server configuration.
-
Method ane
Apply an RDP client, such every bit Remote Desktop Connection, to constitute a remote connection to the Remote Desktop server.
-
Method ii
Use the qwinsta tool to view the listener status on the Remote Desktop server:
- On the Remote Desktop server, click Start, click Run, type cmd, then click OK.
- At the control prompt, type qwinsta, and and so press Enter.
- The RDP-TCP session state should be Listen.
-
Method 3
Use the netstat tool to view the listener condition on the Remote Desktop server:
- On the Remote Desktop server, click Start, click Run, blazon cmd, and and then click OK.
- At the control prompt, blazon
netstat -athen press Enter. - The entry for TCP port 3389 should be Listening.
-
Method 4
Use the telnet tool to connect to the RDP port on the Remote Desktop server:
- From another calculator, click Get-go, click Run, type cmd, and and so click OK.
- At the command prompt, type
telnet <servername> 3389, where <servername> is the name of the Remote Desktop server, and and so printing Enter.
If telnet is successful, you receive the telnet screen and a cursor.
If telnet is not successful, y'all receive the following error message:
Connecting To servername... Could not open connection to the host, on port 3389: Connect failed
The qwinsta, netstat, and telnet tools are also included in Windows XP and Windows Server 2003. You lot can also download and utilise other troubleshooting tools, such as Portqry.
Resolution for Symptom 3
To resolve the event, configure authentication and encryption.
To configure authentication and encryption for a connection, follow these steps:
-
On the RD Session Host server, open Remote Desktop Session Host Configuration. To open Remote Desktop Session Host Configuration, click Showtime, bespeak to Authoritative Tools, indicate to Remote Desktop Services, and and so click Remote Desktop Session Host Configuration.
-
Nether Connections, right-click the name of the connection, and and then click Backdrop.
-
In the Properties dialog box for the connection, on the General tab, in Security layer, select a security method.
-
In Encryption level, click the level that you lot want. You tin select Low, Client Uniform, High, or FIPS Compliant. See Step iv above for Windows Server 2003 for Security layer and Encryption level options.
Note
- To perform this procedure, you must be a member of the Administrators grouping on the local estimator, or you must have been delegated the advisable authorisation. If the computer is joined to a domain, members of the Domain Admins group might be able to perform this process. As a security best practice, consider using Run as to perform this procedure.
- To open Remote Desktop Services Configuration, click Kickoff, click Command Panel, double-click Authoritative Tools, and then double-click Remote Desktop Services Configuration.
- Any encryption level settings that you configure in Group Policy override the configuration that yous set by using the Remote Desktop Services Configuration tool. Also, if you enable the Organization cryptography: Use FIPS compliant algorithms for encryption, hashing, and signing Group Policy setting, this setting overrides the Set client connexion encryption level Group Policy setting.
- When yous alter the encryption level, the new encryption level takes effect the adjacent fourth dimension a user logs on. If you require multiple levels of encryption on 1 server, install multiple network adapters and configure each adapter separately.
- To verify that certificate has a corresponding private key, in Remote Desktop Services Configuration, right-click the connection for which yous want to view the document, click the Full general tab, click Edit, click the document that yous want to view, then click View Certificate. At the bottom of the General tab, the statement, You have a individual key that corresponds to this document, should appear. You can also view this information by using the Certificates snap-in.
- The FIPS compliant setting (the Arrangement cryptography: Use FIPS compliant algorithms for encryption, hashing, and signing setting in Group Policy or the FIPS Compliant setting in Remote Desktop server Configuration) encrypts and decrypts data sent from the client to the server and from the server to the client, with the Federal Information Processing Standard (FIPS) 140-1 encryption algorithms, using Microsoft cryptographic modules. For more than information, come across Terminal Services in Windows Server 2003 Technical Reference.
- The High setting encrypts data sent from the client to the server and from the server to the client by using strong 128-bit encryption.
- The Client Compatible setting encrypts information sent between the client and the server at the maximum primal forcefulness supported by the client.
- The Low setting encrypts data sent from the client to the server using 56-bit encryption.
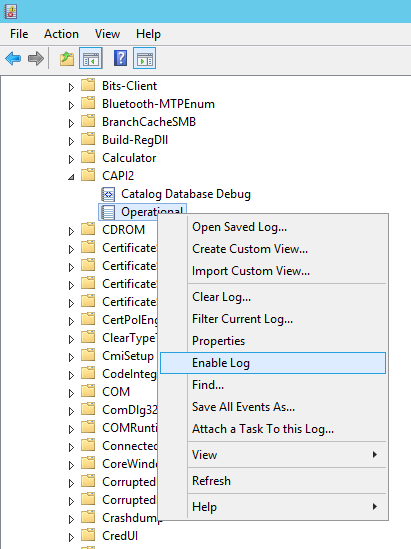
Additional troubleshooting step: Enable CAPI2 event logs
To help troubleshoot this trouble, enable CAPI2 event logs on both the customer and server computers. This command is shown in the following screenshot.
Workaround for the issue (You cannot completely disconnect a Remote Desktop server connectedness) described in Symptom iii
To work around this problem, follow these steps:
- Click Start, click Run, type gpedit.msc, and then click OK.
- Expand Estimator Configuration, expand Administrative Templates, expand Windows Components, expand Remote Desktop Services, expand Remote Desktop Session Host, and then click Connections.
- In the right pane, double-click Configure keep-alive connexion interval.
- Click Enabled, so click OK.
- Close Grouping Policy Object Editor, click OK, and then quit Active Directory Users and Computers.
Resolution for Symptom iv
Important
This section, method, or task contains steps that tell you how to alter the registry. However, serious problems might occur if yous alter the registry incorrectly. Therefore, brand certain that you follow these steps advisedly. For added protection, support the registry earlier you modify it. And then, y'all can restore the registry if a problem occurs. For more information virtually how to back upward and restore the registry, see 322756 How to dorsum upwardly and restore the registry in Windows.
To resolve this problem, back up and so remove the X509 Document registry keys, restart the reckoner, and and so reactivate the Remote Desktop Services Licensing server. To practise this, follow these steps.
Note
Perform the post-obit procedure on each of the Remote Desktop servers.
-
Make certain that the Remote Desktop server registry has been successfully backed up.
-
Start Registry Editor.
-
Locate and then click the post-obit registry subkey:
HKEY_LOCAL_MACHINE\SYSTEM\CurrentControlSet\Control\Terminal Server\RCM -
On the Registry menu, click Export Registry File.
-
Type exported- Certificate in the File name box, and so click *Save.
Notation
If you have to restore this registry subkey in the time to come, double-click the Exported-parameters.reg file that you saved in this stride.
-
Right-click each of the following values, click Delete, and then click Aye to verify the deletion:
- Certificate
- X509 Document
- X509 Document ID
- X509 Certificate2
-
Exit Registry Editor, and then restart the server.
References
For more than information almost Remote Desktop Gateway, come across the following manufactures:
-
967933 Error bulletin when a remote user tries to connect to a resource on a Windows Server 2008-based computer through TS Gateway by using the FQDN of the resource: "Remote Desktop Disconnected"
-
329896 Because of a security error, the client could non connect to the Remote Desktop server
-
Group Policy Settings for Remote Desktop Services in Windows Server 2008 R2
-
Troubleshooting General Remote Desktop Mistake Messages
If this article does not help you resolve the problem, or if you lot experience symptoms that differ from those that are described in this article, visit the Microsoft Support for more information. To search your issue, in the Search support for help box, type the text of the error message that yous received, or type a clarification of the trouble.
Source: https://docs.microsoft.com/en-us/troubleshoot/windows-server/remote/troubleshoot-remote-desktop-disconnected-errors
0 Response to "Emote: Building Source: Remote: Remote: ! Could Not Complete the Action. Please Try Again Later."
Postar um comentário